When the summer heat blazes or a simple sweet craving strikes, nothing hits the spot quite like a scoop of homemade ice cream. But why settle for the ordinary when you can transform your kitchen into a frosty haven with the help of your trusty KitchenAid mixer? In this article, we’re diving into a delightful array of KitchenAid ice cream recipes that promise creamy textures, bold flavors, and endless customization.Whether you’re a seasoned dessert pro or a curious beginner, get ready to chill out and whip up some unforgettable treats that will cool you down and sweeten your day-no ice cream truck necessary!
Chill Out: Perfect KitchenAid Ice Cream Recipes to Try Today brings you an indulgent journey through classic ice cream flavors elevated with creative twists, plus expert guidance for crafting luscious sorbets and silky gelatos in your own kitchen. Whether you’re spinning your first batch or aiming for a pro-level texture, this guide makes every scoop a celebration of flavor and creaminess.
Prep and Cook Time
- Preparation: 20 minutes
- Chilling Time: 4 hours (minimum)
- Churning Time: 30 minutes
Yield
About 1 quart (4 servings)
Difficulty Level
Medium
Ingredients
- 2 cups whole milk
- 2 cups heavy cream
- 3/4 cup granulated sugar
- 1 tbsp pure vanilla extract
- 4 large egg yolks
- Pinch of salt
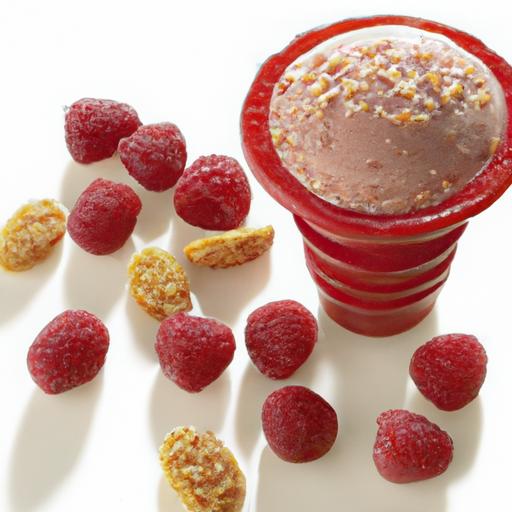
- Optional Add-Ins: 1/2 cup crushed toasted almonds,chocolate chips,or fresh berries
Instructions
- warm the dairy Mix: In a medium saucepan over medium heat,combine whole milk and heavy cream. Heat until just below boiling, about 180°F, stirring occasionally to avoid scorching.
- Whisk Egg yolks & Sugar: In a separate bowl, vigorously whisk egg yolks with granulated sugar and a pinch of salt until pale and thick, about 3-4 minutes.
- Temper the Eggs: Slowly pour about 1 cup of the hot milk mixture into the egg yolks, whisking constantly to avoid scrambling eggs.
- Cook Custard: Return egg-milk mix to saucepan, stirring constantly over medium-low heat until the custard thickens slightly and coats the back of a spoon (170-175°F). Remove from heat.
- Strain & Cool: Strain custard through a fine mesh sieve into a clean bowl to remove any cooked bits. Stir in vanilla extract.Cool to room temperature, then refrigerate at least 4 hours or overnight.
- Prepare Your KitchenAid Ice Cream Maker: Attach the frozen bowl to your KitchenAid stand mixer. Add the chilled custard and churn on low speed for 20-30 minutes until soft-serve texture forms.
- Customize: In the final 5 minutes, fold in any optional add-ins like toasted almonds or chocolate chips for delightful texture contrasts.
- Freeze to Set: Transfer ice cream to an airtight container and freeze for at least 2 hours for a firmer scoop.
Tips for Success with Your KitchenAid Ice Cream Maker
- Freeze the Bowl Thoroughly: ensure your KitchenAid ice cream bowl is frozen for at least 15 hours before use to guarantee proper freezing power.
- Chill Your Base Well: A cold custard base churns faster and results in less ice crystals; plan ahead and refrigerate overnight.
- Option Sweeteners: Substitute granulated sugar with honey or maple syrup for unique flavor notes-reduce othre liquid slightly to maintain texture.
- Play with Flavors: Add small amounts of spices like cinnamon or espresso powder during heating just for a subtle flavor upgrade.
- Keep Mix-ins Light: Add nuts,cookie pieces,or fruit near the end of churning to keep them evenly distributed without getting crushed.
Serving Suggestions
Serve scoops in chilled bowls for a perfect chill experience. Garnish with a sprig of fresh mint, a drizzle of homemade caramel, or a sprinkle of toasted coconut flakes. For a stunning presentation, pair with warm fruit compote or a crisp waffle cone.Don’t forget to photograph your creation, taking advantage of natural light to highlight the creamy texture and vibrant swirls formed by your custom add-ins!
| Nutrient | Per Serving (1/4 quart) |
|---|---|
| Calories | 320 kcal |
| Protein | 5 g |
| Carbohydrates | 28 g |
| Fat | 20 g |
Exploring Chill Out KitchenAid Ice Cream Maker Recipes: Creamy Sorbets and Gelatos
Once you’re comfortable with classic ice cream bases, experimenting with sorbets or gelatos unlocks new realms of indulgence and refinement. Sorbets boast vibrant fruit flavors with a crisp, refreshing texture, typically crafted without dairy. For a luscious gelato,reduce fat content with more milk and less cream,stirring slower for denser consistency. Incorporating fresh fruit purées or fragrant herbs like basil and lavender takes these recipes to gourmet status. For detailed sorbet recipes and more inspiration, check out our Ultimate sorbet Guide.
According to Serious Eats, understanding ingredient ratios and chilling times is essential for mastering ice cream perfection at home with your KitchenAid.

Q&A
Q&A: Chill Out with Perfect KitchenAid Ice Cream Recipes to Try Today
Q: Why use a KitchenAid ice cream maker attachment instead of a conventional ice cream machine?
A: The KitchenAid ice cream maker attachment turns your trusty stand mixer into a versatile dessert wizard! Unlike standalone machines, it pairs perfectly with your mixer’s powerful motor, offering consistent churning and effortless operation.Plus, it saves counter space and means you only buy one appliance instead of two. Its convenience and quality whipped together like the creamiest batch of ice cream!
Q: What are some must-try ice cream flavors using the kitchenaid attachment?
A: Oh, the possibilities are endless! Classic vanilla bean is always a winner, but why stop there? Try rich salted caramel swirls, vibrant matcha green tea, or even a decadent espresso fudge ripple. For a playful twist, mix in crushed cookies, fresh berries, or toasted nuts. The KitchenAid makes it simple to experiment and freeze your way to frozen perfection.
Q: How long does it typically take to make ice cream with the KitchenAid attachment?
A: Once your base mixture is chilled, the KitchenAid attachment usually takes about 20-30 minutes to churn your ice cream to the perfect creamy consistency. Think of it as your personal ice cream barista,mixing away while you prep cones or get the toppings ready. Patience pays off deliciously!
Q: Can I make sorbet or gelato with this attachment too?
A: Absolutely! The KitchenAid ice cream maker isn’t just for traditional ice cream. It’s perfect for crafting smooth, fruity sorbets-just blend pureed fruits, sugar, and a splash of lemon juice and churn away. For gelato, use a recipe with less air and more milk than cream, and you’ll have that luxuriously dense Italian treat in no time.
Q: What tips ensure the best texture and flavor from the KitchenAid ice cream maker?
A: Keep your bowl well-frozen (at least 15 hours) to ensure smooth churning. Use high-quality ingredients-real cream, fresh vanilla, ripe fruits-for the richest flavors. Don’t rush the freezing process; the gradual churn locks in creaminess and prevents icy crystals. And always chill your ice cream base thoroughly before starting-it’s key for that silky finish.
Q: Can the KitchenAid ice cream maker handle dairy-free or vegan recipes?
A: Yes, it can! Coconut milk, almond milk, or cashew cream bases work beautifully with the KitchenAid. Just remember dairy alternatives frequently enough freeze a bit harder, so scoop a few minutes after freezing for the perfect texture. With a little creativity, everyone can enjoy homemade frozen treats, no matter their dietary needs.
Q: How can I get creative with mix-ins and toppings for my KitchenAid ice cream?
A: The final minutes of churning are perfect for adding in your mix-ins-think chocolate chips, crushed candy bars, or swirls of fruit preserves.Once scooped, go wild with toppings: toasted coconut, sea salt flakes, fresh herbs, or a drizzle of homemade fudge sauce. Your ice cream is your canvas-get ready to chill and thrill your taste buds!
Ready to whip up your dream dessert? Dust off that KitchenAid, grab your favorite ingredients, and get churning-cool, creamy magic awaits!
Concluding Remarks
As the summer heat waves roll in or whenever you’re craving a sweet, creamy escape, your KitchenAid stand mixer becomes more than just a kitchen appliance-it’s your passport to homemade ice cream bliss. With these perfect recipes in hand, you’re all set to churn out luscious, dreamy flavors that beat any store-bought pint. So go ahead, experiment with swirls, mix-ins, and toppings, and watch your kitchen transform into a frosty wonderland. Chill out, scoop up your favorite creation, and savor every cool, delightful bite-you’ve earned it!