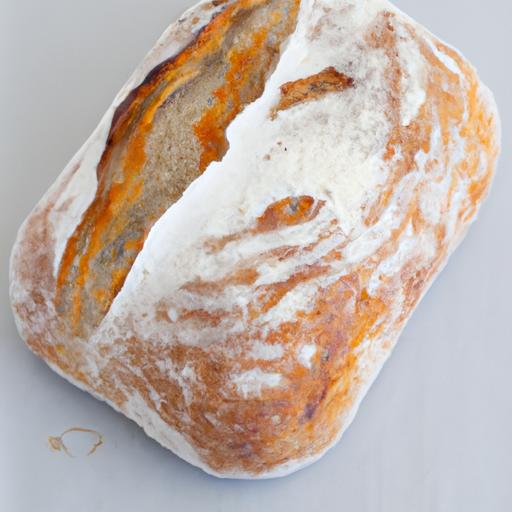
There’s something undeniably magical about pulling a warm, golden loaf of sourdough from the oven-the crackling crust, the tender crumb, and the tangy aroma that fills the kitchen. But beyond its irresistible flavor lies a timeless craft, one that has been perfected over centuries and continues to captivate bakers around the world. Whether your a curious novice or an aspiring artisan, mastering the art of sourdough is both a rewarding journey and a delicious adventure. In this guide, we’ll demystify the process with a simple, approachable recipe that invites you to nurture yoru own wild yeast starter and create bread that’s as wholesome as it is mouthwatering. get ready to transform basic ingredients into something extraordinary-one loaf at a time.
Master the Art of Sourdough starts with a journey into the fascinating world of fermentation – an ancient culinary craft that transforms simple ingredients into a loaf bursting with depth and character. This natural process marries wild yeast and lactobacilli bacteria to create the signature tang and airy crumb of sourdough bread. Understanding each step, from selecting the right flour to mastering dough manipulation, will empower you to bake with confidence and intuition.
Prep and Cook time
- Preparation: 30 minutes active + 12-18 hours fermentation
- Baking: 35-45 minutes
- Total Time: Approximately 14-19 hours
yield
One standard 900g loaf, perfect for 8 hearty slices.
Difficulty Level
Medium – Ideal for home bakers ready to elevate their bread-making skills.
Ingredients
- 150g active sourdough starter (fed and bubbly)
- 500g bread flour, preferably high-protein for strength and chew
- 350g water, filtered and at room temperature (about 75°F/24°C)
- 10g fine sea salt
Understanding the Science Behind sourdough Fermentation
Sourdough fermentation is the cornerstone of this artisanal bread’s unique flavor and texture. The wild yeast naturally present in your starter feeds on the flour’s sugars, producing carbon dioxide bubbles that leaven the dough. Together, lactobacilli create lactic and acetic acids, which contribute to sourdough’s signature tang and complex aroma. A balanced hydration and temperature ensure these microscopic organisms work harmoniously, creating a loaf that’s light yet robust.
Choosing the Perfect Flour and Water for Your Starter
The choice of flour deeply influences fermentation speed and flavor complexity.Opt for a high-quality bread flour rich in protein (12-14%) to build a strong gluten network, while whole grain flours like rye or whole wheat can invigorate your starter with extra nutrients and natural yeasts. Water quality is equally vital; always use filtered, chlorine-free water to protect the delicate microbes that drive fermentation. Room temperature water around 75°F helps create an environment that encourages healthy, active starter growth.
Step by Step Techniques for Kneading and Shaping Your Loaf
- Mixing: Combine starter,water,and flour in a large bowl until no dry bits remain. Autolyse for 30 minutes to hydrate the flour.
- Kneading: Use the stretch and fold technique every 30 minutes for 2 hours.Pull dough gently from one side and fold it over the center, rotating the bowl each time.This gluten development method strengthens the dough without overworking it.
- Bulk Fermentation: Let the dough rest at room temperature for 4-6 hours until it doubles in size and shows bubbles on the surface.
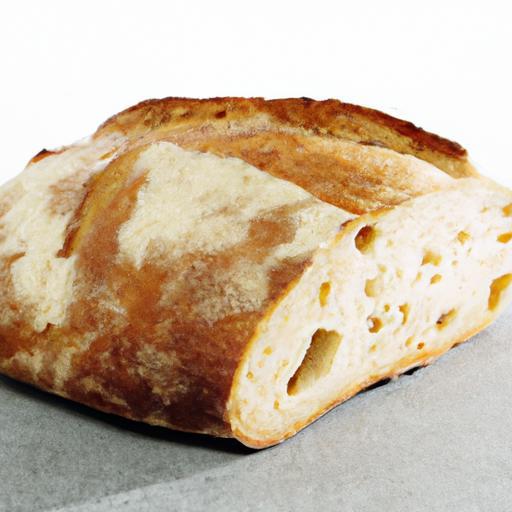
- Shaping: Turn dough onto a floured surface, gently degas by pressing down with fingertips, then fold edges into center to form a tight ball. Use surface tension to create a taut skin,which ensures an open crumb and controlled rise.
- Proofing: Place shaped dough into a floured banneton or bowl, cover, and refrigerate overnight (8-12 hrs) for cold fermentation-enhancing flavor complexity.
Tips for Achieving the Ideal Crust and flavor Profile
For a cracking, golden crust, preheat your oven with a Dutch oven or heavy-lidded pot inside to 500°F (260°C). Transfer the proofed dough onto parchment paper, score the top with a sharp lame, then place it into the hot Dutch oven and cover.Bake covered for 20 minutes to lock in steam,then uncover and reduce temperature to 450°F (232°C) for an additional 15-25 minutes,allowing the crust to caramelize beautifully.
Experiment with hydration between 70% and 75% (water weight/flour weight) to achieve the crumb density you prefer. Longer cold ferments amplify sour notes and enrich flavors. For a milder profile, shorten the refrigerated proof or use less whole grain flour. Always let the loaf cool completely on a wire rack before slicing to allow crumb to set fully.
chef’s Notes
- Starter Maintenance: Feed your starter regularly with equal parts flour and water to keep it lively.
- Substitutions: Whole wheat or spelt flours can replace up to 25% of the bread flour for nuttier flavor.
- Common Pitfall: Overproofing leads to a dense loaf; check your dough’s rise and elasticity.
- Make-Ahead: cold-proofing the shaped dough overnight not only deepens flavor but also frees up your baking day.
Serving Suggestions
Sourdough shines when paired with simplicity. Serve toasted slices with creamy butter and a sprinkle of flaky sea salt, or accompany with a rustic tomato soup or sharp cheese platter. Garnish with fresh rosemary sprigs or a drizzle of high-quality olive oil for an inviting presentation that highlights its artisanal charm.

| Nutritional Info (per slice) | Calories | protein | carbs | Fat |
|---|---|---|---|---|
| 1 slice (approx.112g) | 190 | 6g | 38g | 1g |
For further inspiration on sourdough techniques and baking mastery, check our Artisan Bread Techniques guide or visit the King Arthur Baking sourdough guide for expert insights.
Q&A
Q&A: Master the Art of Sourdough – A Simple Bread Recipe Guide
Q1: What makes sourdough bread different from other types of bread?
A: Sourdough is a living, breathing bread! Unlike breads made with commercial yeast, sourdough relies on wild yeasts and lactic acid bacteria naturally found in flour and the environment. This wild fermentation creates a unique tangy flavor, a chewy texture, and a crust that crackles with every bite.Plus, it’s easier to digest and keeps fresher longer.
Q2: Do I need any special equipment to start baking sourdough?
A: Not really! The essentials are simple: a mixing bowl, a kitchen scale for accuracy, a bench scraper or spatula, and a Dutch oven or heavy baking pot with a lid to mimic the steam environment of a professional oven. A proofing basket (banneton) is a bonus for shaping and rising your dough, but a well-floured bowl works too.
Q3: How do I create my own sourdough starter?
A: Making your starter is like nurturing a tiny pet.Mix equal parts flour and water (by weight), stir, and leave it at room temperature. Feed it daily with fresh flour and water,discarding a portion each time,until it bubbles and smells tangy and fresh-usually about 5-7 days. This bubbly mixture holds the yeast and bacteria that will power your bread’s rise.
Q4: What’s a simple sourdough recipe for beginners?
A: Start with these basics:
- 500g bread flour
- 350g water
- 100g active sourdough starter
- 10g salt
Mix flour and water first and let it rest. Add starter and salt, then knead or stretch and fold every 30 minutes for a few hours. Let it rise until doubled, shape the loaf, proof again, and bake in a preheated Dutch oven at 450°F (230°C) for about 40 minutes.Q5: Why is the ‘stretch and fold’ technique vital?
A: Stretching and folding gently develops the dough’s gluten network without heavy kneading. It traps gas bubbles, giving your bread that gorgeous airy crumb, and improves texture and strength. Plus, it’s a lovely way to connect with your dough, almost like a mini yoga session.Q6: How do I know when my dough is ready to bake?
A: Look for a dough that has almost doubled in size, feels slightly puffy, and passes the “poke test”: gently press a finger into the dough-if the indentation springs back slowly but remains visible, your dough is ready. Too rapid a bounce means it needs more time; no bounce means it might be over-proofed.
Q7: What tips can definitely help me get a crispy crust?
A: Steam is the secret to crackling crusts-baking your bread inside a covered dutch oven traps steam, which gelatinizes the crust’s surface. After about 20 minutes, removing the lid lets the crust brown and crisp beautifully. Preheating your Dutch oven and baking stone helps as well!
Q8: Can sourdough baking be a enduring practice?
A: Absolutely! Growing your own starter reduces dependence on commercial yeast, and using simple ingredients you already have minimizes waste. Plus,sourdough’s longer shelf life means less thrown-away bread. It’s a delicious way to practice mindfulness and eco-amiable cooking.
Q9: How can I troubleshoot common sourdough problems?
A: Stiff dough? Add a touch more water next time. Dense crumb? Check your starter’s activity-maybe feed it more frequently. Overly sour bread? Shorten fermentation time or adjust starter amount. remember, sourdough is a living craft; each bake teaches you more.
Q10: What’s the best way to store sourdough bread?
A: Keep it wrapped in a clean kitchen towel or paper bag at room temperature to maintain its crispy crust for up to 3 days. For longer storage, slicing and freezing the bread is your friend-toast the slices straight from the freezer for a fresh-baked taste any time.
Feel inspired to roll up your sleeves and join the sourdough renaissance? With patience, practice, and a pinch of passion, you’ll soon be crafting loaves that sing with flavor and character-one simple recipe at a time. Happy baking!
To Conclude
As you close the lid on your oven and breathe in the warm, tangy aroma of your freshly baked sourdough, remember: mastering this ancient craft is as much about patience and intuition as it is indeed about technique. With each loaf, you’re not just baking bread-you’re nurturing a living tradition, a bubbling symphony of wild yeast and flour that connects you to centuries of bakers before you. So let this simple recipe guide be your compass on a flavorful journey, encouraging you to experiment, learn, and savor every crusty bite. The art of sourdough is yours to discover-one crumb at a time.