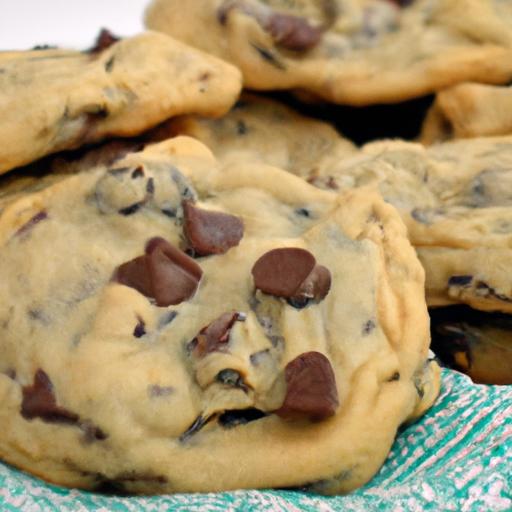

There’s something undeniably magical about the aroma of freshly baked chocolate chip cookies wafting through the kitchen-a scent that instantly evokes comfort, nostalgia, and sweet anticipation. But crafting the perfect cookie is more than just mixing flour and chocolate chips; its an art and a science, a delicate balance of ingredients, technique, and timing. In this ultimate guide, we’ll unravel the secrets behind achieving cookies that are crisp on the edges, soft and chewy in the center, and bursting with melty chocolate goodness.Whether you’re a seasoned baker or a curious novice,get ready to transform your cookie game and bake your way to sweet perfection.
Mastering the art of crafting chocolate chip cookies involves more than just mixing flour and chocolate chips. Each ingredient plays a pivotal role in delivering that irresistible texture and flavor that makes these cookies so beloved across generations. By carefully selecting high-quality components and applying precise mixing techniques, you unlock a world where golden edges meet chewy centers, and every bite bursts with perfectly balanced sweetness and chocolate richness.
Prep and Cook Time
- Readiness: 20 minutes
- resting Dough (recommended): 30 minutes to 24 hours
- Baking: 10-12 minutes per batch
- Total Time: Approximately 1 hour (including resting)
Yield
About 24 medium-sized cookies
Difficulty Level
Easy to Medium – Perfect for both beginners and seasoned bakers aiming for perfection
Ingredients
- 2 ⅓ cups all-purpose flour, sifted
- 1 teaspoon baking soda
- ½ teaspoon fine sea salt
- 1 cup (2 sticks) unsalted butter, softened but cool
- ¾ cup light brown sugar, packed
- ½ cup granulated sugar
- 2 large eggs, at room temperature
- 2 teaspoons pure vanilla extract
- 1 ½ cups high-quality semisweet chocolate chips or chunks
- Optional: ½ cup toasted chopped walnuts or pecans for added crunch
Instructions
- Preheat your oven to 350°F (175°C). Line baking sheets with parchment paper or silicone mats to ensure even baking and effortless release.
- Sift together the flour, baking soda, and salt in a medium bowl. This step guarantees even leavening and prevents clumps for smooth dough texture.
- Cream the butter and sugars in a large mixing bowl using an electric mixer on medium speed until light and fluffy,about 3-4 minutes. this aeration step helps develop tenderness in the crumb.
- Beat in the eggs one at a time, ensuring each is fully incorporated before adding the next. Stir in the vanilla extract. This slow mixing builds a stable dough structure while infusing aromatic warmth.
- gradually add the dry ingredients to the wet mixture. Mix on low speed or fold in gently by hand using a spatula. Avoid overmixing to keep the dough tender and prevent tough cookies.
- Fold in the chocolate chips and nuts (if using) evenly, ensuring every spoonful promises a rich chocolate burst.
- Chill the dough for at least 30 minutes, or ideally overnight in the refrigerator. This resting period allows the flour to hydrate fully and the butter to firm up – both vital for that coveted chewy center and defined golden edges.
- Scoop dough using a cookie scoop or tablespoon, spacing cookies about 2 inches apart on the prepared baking sheets.
- Bake for 10-12 minutes until edges are perfectly golden but centers remain slightly soft. Rotate pans halfway through to ensure uniform color and texture.
- Cool on the baking sheet for 5 minutes before transferring to wire racks.This resting step lets residual heat finish the baking process internal, achieving that dreamy balance of chewy center and crisp edge.
Tips for Success
- Ingredient Choice: Use unsalted butter for ultimate control over salt levels. High-quality chocolate with at least 60% cacao intensifies flavor without excess sweetness.
- Mixing Technique: Cream butter and sugar until pale to incorporate air – essential for lighter texture. Stop mixing as soon as the flour is combined to avoid a dense cookie.
- Rest Dough: Allowing the dough to rest in the fridge enhances gluten development and flavor complexity, resulting in a superior texture.
- Baking Time: Don’t overbake. Pull cookies when centers are just set but still soft; they continue cooking as they cool.
- Substitutions: For a dairy-free version, substitute with coconut oil (solid state) and dairy-free chocolate chips.
Serving Suggestions
Serve warm with a tall glass of cold milk or a scoop of vanilla bean ice cream for an indulgent treat. Garnish with a sprinkle of flaky sea salt atop freshly baked cookies to accentuate the chocolate’s richness and create a mouthwatering sweet-salty counterpoint. For a festive touch, drizzle melted dark chocolate or dust with confectioners’ sugar before serving.

| Nutrient | Per Cookie (1 of 24) |
|---|---|
| Calories | 190 kcal |
| Protein | 2 g |
| Carbohydrates | 25 g |
| Fat | 9 g |
Discover more sweet baking inspiration in our classic Baking Recipes collection. For science-based insights into the role of butter and sugar in cookie texture, visit Serious Eats.
Q&A
Q: What’s the secret to baking the perfect chocolate chip cookies?
A: The magic lies in balancing quality ingredients, precise measurements, and thoughtful technique. Use real butter for richness, pure vanilla extract for depth, and a mix of brown and white sugars for that perfect chewiness and caramelized flavor. Don’t rush the dough-chilling it allows the flavors to develop and keeps the cookies from spreading too thin.
Q: Should I use baking soda or baking powder?
A: For chocolate chip cookies, baking soda is your best friend.It reacts with the acidic components (like brown sugar) to create a tender, chewy texture and helps cookies spread just right. baking powder can make cookies puffier and cakier, which is less typical for classic chocolate chip cookies.
Q: Is it better to use melted butter or softened butter?
A: Softened butter is ideal because it creates a creamy base to evenly incorporate with sugar, trapping air that leads to fluffier cookies. Melted butter results in denser, chewier cookies with less rise.If you prefer a fudgier bite, melting the butter can be a fun experiment!
Q: how does chilling the dough impact the cookies?
A: Patience pays off here. Chilling the dough solidifies the fats, slows down gluten development, and lets the flavors marry.This means cookies will bake thicker,with a more complex taste and a better texture balance-soft in the middle with slightly crispy edges.
Q: Can I swap chocolate chips with other mix-ins?
A: Absolutely! Chocolate chips are classic, but feel free to experiment with chunks of dark, milk, or white chocolate, nuts, dried fruit, or even toffee bits. Just keep the volume similar to the recipe’s recommended amount so your cookie dough doesn’t become too wet or crumbly.
Q: How do baking time and temperature affect the final cookie?
A: Baking at 350°F (175°C) for 8-12 minutes is golden-literally and figuratively. Shorter bake times yield soft, almost underbaked centers, while longer bake times produce crispy edges and chewy insides. Adjust time for your oven and personal texture preference, but watch closely-cookies can go from perfect to overdone quickly!
Q: Why do some cookies turn out flat and greasy?
A: This often happens when butter is too soft or melted, causing excessive spreading, or when the dough lacks enough flour or chilling time. Also, overmixing can break down the dough’s structure. Stick to chilled dough and measured ingredients to keep your cookies plump and perfectly textured.
Q: Can I make the dough ahead for baking later?
A: yes! Cookie dough can chill for up to 72 hours in the fridge or be frozen for up to 3 months. Before baking frozen dough, add a couple extra minutes to the bake time.This flexibility is a game-changer for crave-worthy cookies on demand!
Q: How do I store my cookies to keep them fresh?
A: store cooled cookies in an airtight container at room temperature. Add a slice of bread inside to keep them soft-the moisture migrates into the cookies, preventing them from drying out. They’ll stay delicious for up to a week, though they rarely last that long!
Q: Any tips for getting that perfectly crackled top?
A: For a gorgeous crackled surface, slightly underbake your cookies and let them cool on the baking sheet. This helps the tops set gently while still keeping the interior tender, creating that classic, irresistible texture contrast we all adore.
Insights and Conclusions
As the sweet aroma of freshly baked chocolate chip cookies fills your kitchen, you’re not just enjoying a treat-you’re savoring a craft perfected through patience, technique, and a sprinkle of love.With this ultimate guide in hand, you now hold the secret recipe to transform simple ingredients into golden, gooey masterpieces that warm both heart and home.So, tie on your apron, trust the process, and let each batch be a delicious reminder that baking is as much an art as it is a science. Here’s to countless cookies baked to perfection-and the joyful moments they create, one chocolate chip at a time.