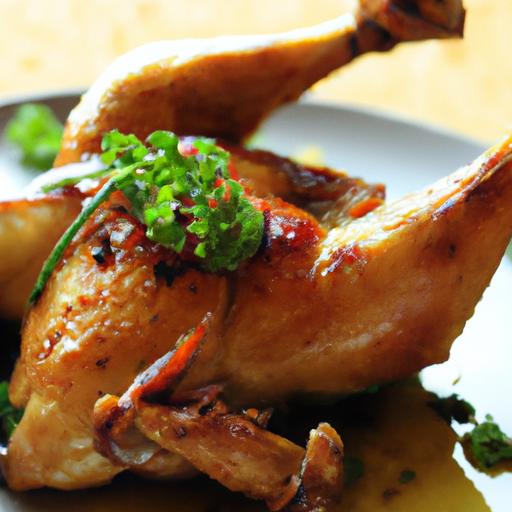
there’s somthing undeniably magical about a dish that marries tender, fall-off-the-bone chicken with irresistibly crispy skin-a texture and flavor contrast that turns a simple meal into a culinary celebration. enter the art of braising chicken in the oven, a technique that gently coaxes out deep, savory richness while locking in moisture. in this article,we’ll explore the secrets behind achieving perfectly braised oven chicken with that coveted golden,crackling skin. whether you’re a seasoned home cook or a curious kitchen adventurer, get ready to transform your chicken dinner into an unforgettable experience that’s as comforting as it is impressive.
Perfectly Braised Oven Chicken with Crispy Skin Recipe begins with selecting the ideal chicken cut, a vital step that sets the stage for juicy, tender meat infused with deep flavors. The magic of braising lies in slow, gentle cooking paired with moisture, turning even humble cuts into culinary gold. To elevate this dish to perfection, understanding the nuances of cut choice, mastering braising technique, and finishing with a flawlessly crisp skin is essential.
Choosing the Right Cut for juicy Braised Oven Chicken
for a dish centered on perfectly braised oven chicken with crispy skin, the choice of cut profoundly influences the outcome.Dark meat cuts-such as thighs and drumsticks-are naturally richer in fat and connective tissue,which break down beautifully during braising,yielding tender,succulent meat that remains moist. Bone-in, skin-on pieces provide flavor depth and hold up well to oven heat, allowing the skin to crisp masterfully once braised.
White meat cuts, like chicken breasts, tend to dry out quickly, so if chosen, they benefit from shorter braising times or partial braising followed by roasting.Ultimately, opting for bone-in, skin-on thighs is my favorite for this recipe, promising a harmonious balance of tenderness and crispness that delivers on both texture and flavor.
Mastering the Braising Technique for Tender, Flavorful Meat
Braising is the heart of this recipe’s success, a method where partially submerging the chicken in flavorful liquid and cooking it slowly in a low oven allows connective tissues to melt and infuse every bite with rich taste. Start by searing the chicken skin-side down in a hot, heavy-bottomed pan to render fat and develop a golden crust. This initial caramelization builds layers of flavor that transform the final dish.
Once seared, deglaze the pan with aromatic liquids such as white wine, stock, or a combination infused with herbs and spices. Transfer everything to an oven-safe pot with a snug lid, maintaining enough liquid to reach halfway up the chicken pieces, and cook at 325°F (160°C) for 45-60 minutes.This gentle heat and moisture synergy yields chicken that’s effortlessly tender, soaking up the braising liquid’s essence.
Secrets to achieving the Ultimate Crispy Skin Finish
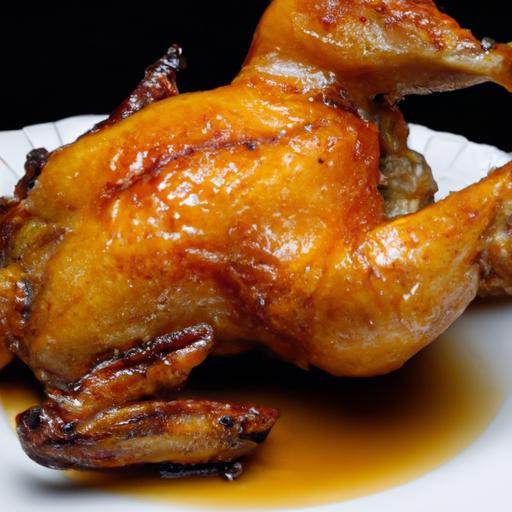
Getting a perfectly crisp skin after braising might seem challenging but is absolutely attainable. The key lies in patting the chicken dry before the final roast. Once braising is complete, carefully remove chicken pieces and set the braising liquid aside to reduce further if desired. Place the chicken on a wire rack over a baking sheet to allow air circulation beneath.
Then, roast uncovered in a preheated 425°F (220°C) oven for 15-20 minutes. This high heat evaporates residual moisture on the skin, tightening it into a satisfyingly crunchy texture. For the ultimate finish, brush the skin lightly with oil or rendered fat before roasting and season with flaky sea salt right after coming out of the oven to enhance the crisp contrast.
Essential Tools and Ingredients for Perfect Oven-Braised Chicken
Having the right tools makes the journey towards perfectly braised oven chicken with crispy skin smoother and more enjoyable. Invest in a heavy-duty, oven-safe braising pot or Dutch oven with a tight-fitting lid to ensure even heat distribution and moisture retention. A good cast-iron skillet is excellent for searing, while a wire rack assists in crisping the skin post-braise.
Ingredient-wise, lean on quality chicken (organic or free-range if possible), fresh herbs like thyme and rosemary, aromatic vegetables (onions, garlic, carrots), and flavorful liquids such as chicken stock and dry white wine or vermouth. Don’t underestimate the power of simple pantry staples like olive oil, sea salt, and freshly cracked pepper-they uplift every component.
Prep and Cook Time
- Preparation: 15 minutes
- Braising: 45-60 minutes
- Final roasting: 15-20 minutes
- Total Time: approximately 1 hour 20 minutes
Yield
serves 4 hearty portions.
Difficulty Level
Medium – approachable with some hands-on technique and timing.
Ingredients
- 4 bone-in, skin-on chicken thighs (about 1 ½ pounds)
- 2 tablespoons olive oil or rendered chicken fat
- 1 medium onion, finely chopped
- 3 garlic cloves, smashed
- 2 medium carrots, cut into chunks
- 1 cup dry white wine (such as Sauvignon Blanc)
- 1 ½ cups low-sodium chicken stock
- 2 sprigs fresh thyme
- 1 sprig fresh rosemary
- Salt and freshly ground black pepper, to taste
- Flaky sea salt, for finishing
Instructions
- Preheat the oven to 325°F (160°C).
- Pat the chicken thighs dry with paper towels and season generously with salt and pepper.
- Heat olive oil in a large cast-iron skillet or Dutch oven over medium-high heat.
- Sear the chicken skin-side down until golden brown and crispy, about 5 minutes. Flip and brown the other side for 3 minutes.Remove and set aside.
- Add onions, garlic, and carrots to the pot; sauté for 4-5 minutes until softened and fragrant.
- Pour in white wine to deglaze the pot, scraping up any browned bits; cook for 3 minutes to reduce slightly.
- Add chicken stock, thyme, and rosemary, then nestle the seared chicken pieces back into the pot. The liquid should come halfway up the sides of the chicken.
- Cover tightly and transfer the pot to the preheated oven.
- Braise for 45-60 minutes, until the chicken is tender and cooked through.
- Carefully remove the chicken pieces from the liquid and place on a wire rack over a baking tray.
- Increase oven temperature to 425°F (220°C).
- Brush chicken skin lightly with oil or rendered fat; sprinkle with flaky sea salt.
- Roast uncovered for 15-20 minutes to crisp the skin thoroughly.
- Optionally, strain and reduce braising liquid on stovetop to a syrupy sauce; spoon over chicken when serving.
Tips for Success
- Dry the skin well before searing and before roasting to encourage crispiness.
- Don’t overcrowd the pan during searing; work in batches if needed to obtain an even golden crust.
- Use a meat thermometer to ensure chicken reaches 165°F (74°C) for safety and juiciness.
- Make-ahead option: Braise the chicken a day in advance and refrigerate. Before serving, reheat gently and crisp skin in the oven.
- Swap herbs: Bay leaves and sage also complement the braising liquid beautifully.
- For a gluten-free option, ensure all stock and condiments are GF certified.
Serving Suggestions
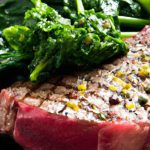
Serve this perfectly braised oven chicken with crispy skin alongside creamy mashed potatoes or buttery polenta to soak up the luscious braising sauce. Add sautéed seasonal greens or roasted root vegetables for contrasting textures. Garnish with fresh thyme sprigs and a wedge of lemon for a vibrant finish that brightens the rich flavors.

| Nutrient | Amount per Serving |
|---|---|
| Calories | 420 kcal |
| Protein | 35 g |
| Carbohydrates | 5 g |
| Fat | 28 g |
For more expert tips on meat cooking techniques, check out our Ultimate Guide to Braising Meats. To deepen your knowledge about poultry standards and safety, visit FoodSafety.gov.
Q&A
Q&A: Perfectly Braised Oven Chicken with Crispy Skin recipe
Q1: What makes braising chicken in the oven different from other cooking methods?
A1: Braising is a magical marriage of moisture and heat. Unlike roasting, which cooks chicken with dry heat, braising involves simmering the chicken partially submerged in flavorful liquid.This gentle cooking method locks in juiciness and breaks down connective tissues, resulting in tender, fall-off-the-bone meat. The oven’s steady heat ensures even cooking,and with a final burst of high temperature or broiling,you get that irresistible crispy skin.
Q2: How do you achieve perfectly crispy skin when braising chicken?
A2: The secret lies in managing moisture and temperature. Before braising, pat the chicken skin dry – moisture is the enemy of crispiness. Sear the chicken skin-side down in a hot pan until golden and crackling before transferring to the oven. During oven braising, keep the chicken skin partially exposed above the braising liquid. finish with a high-heat blast or broil to render out any excess fat and crisp the skin to perfection.
Q3: What type of liquid works best for braising chicken?
A3: The braising liquid is your flavor canvas! Classic choices include chicken broth,white wine,or a combination enriched with aromatics like garlic,onions,herbs,and lemon. Some adventurous cooks add a splash of cider or soy sauce for depth. The trick is balancing flavor with enough liquid to keep the chicken moist without submerging it wholly, preserving that crispy skin.
Q4: Can I use any cut of chicken for this recipe?
A4: Absolutely! Bone-in, skin-on pieces like thighs, drumsticks, or even a whole spatchcocked chicken are ideal. These cuts hold up beautifully under braising heat and benefit from the slow cooking to develop tenderness. Skinless or boneless pieces won’t get the same flavor explosion or crispy skin texture but can still be appetizing with some tweaks.
Q5: How long should I braise chicken in the oven to get the best results?
A5: Expect about 30-45 minutes at a moderate temperature (around 325°F/160°C). This window allows the collagen to gently melt into luscious juices without drying out the meat.Larger pieces or a whole bird may need extra time, but don’t forget the finishing step under high heat to crisp the skin gloriously at the end.
Q6: Are there any tips for elevating the flavor of this braised oven chicken?
A6: Yes! Layer your flavors by seasoning the chicken generously with salt and pepper before searing. Use fresh herbs like thyme, rosemary, or sage in the braising liquid. Aromatics such as garlic cloves, shallots, or citrus zest add brightness. Lastly, reserve some of the braising liquid and reduce it into a glossy sauce to drizzle over the finished chicken for that wow-factor.
Q7: Can I prepare this dish ahead of time?
A7: Braised chicken actually tastes better the next day, as flavors marry while resting in the fridge. To reheat, gently warm the chicken and use the reduced braising liquid to keep it moist, then rejuvenate the skin under the broiler for a crispy encore. Perfect for meal prep or impressing guests with minimal last-minute fuss!
Harness the magic of moist heat and scorchingly crispy skin, and this perfectly braised oven chicken recipe will become your kitchen’s superstar!
Key Takeaways
Bringing together juicy, tender meat and irresistibly crispy skin, this perfectly braised oven chicken recipe transforms a simple dinner into a culinary masterpiece. With just a few straightforward steps, you’ll unlock flavors that sing and textures that delight-proving that homemade comfort food can be both effortless and remarkable. So next time you crave that golden, crispy finish paired with melt-in-your-mouth tenderness, remember: the secret lies in the slow braise and the hot oven’s kiss. Happy cooking, and even happier eating!