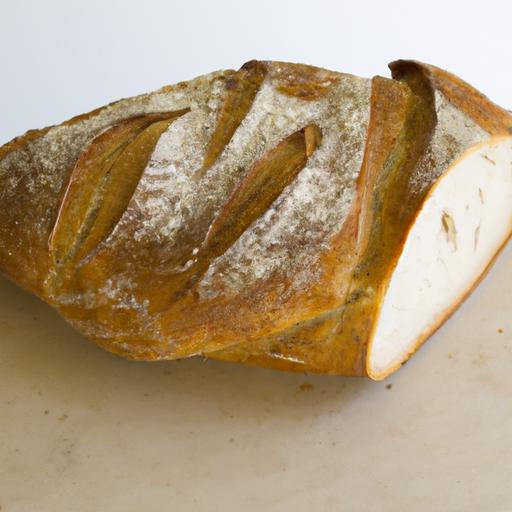
There’s something undeniably magical about the art of sourdough-a simple blend of flour, water, and time that transforms into a crusty, tangy masterpiece bursting with flavor and character. In a world where convenience often trumps craft, sourdough bread invites us to slow down, embrace natural fermentation, and reconnect with a centuries-old tradition. Whether you’re a curious beginner or a seasoned baker looking to refine your technique, this ultimate guide to mastering sourdough will walk you through every step of the process. From nurturing your bubbly starter to achieving that perfect, golden loaf, prepare to unlock the secrets behind homemade bread that’s as rewarding to make as it is to eat.
Welcome to your journey toward sourdough mastery-where patience meets passion, and science mingles with artistry.
Understanding the Science Behind Sourdough Fermentation
Mastering sourdough is a journey that combines art with science, inviting you into a world where wild yeast and lactic acid bacteria perform a gorgeous symphony of fermentation. This natural process not only leavens your bread but also deepens flavor and enhances digestibility.
During fermentation, wild yeast consumes the sugars in flour, producing carbon dioxide that creates those coveted airy bubbles, while bacteria generate organic acids that give sourdough its signature tang. This delicate balance requires patience and respect; nurturing your sourdough starter means cultivating a living ecosystem that thrives on flour and water.
Choosing the Perfect Flour and Water for Your Starter
Selecting the right flour is fundamental for an active starter. Whole grain flours such as whole wheat and rye offer abundant nutrients and wild yeasts, giving your starter a powerful boost. Meanwhile, unbleached all-purpose flour provides a milder but consistent option, ideal for bakers seeking a predictable rise.
Water quality also plays a subtle but crucial role: use filtered or spring water free from chlorine and chloramine to avoid inhibiting fermentation. Room temperature water helps maintain an environment where microbes flourish happily, feeding your starter and creating the foundation of flavor and strength.
Techniques for Maintaining a Healthy and Active Sourdough Starter
Tending to your sourdough starter is like caring for a beloved pet - consistency is key. Feed it regularly with equal parts flour and water by weight, discard portions to prevent overcrowding, and store it appropriately depending on your baking schedule.
- Feed the starter every 12-24 hours at room temperature for a robust rise.
- Discard before feeding to maintain a manageable volume and stimulate fresh growth.
- Keep the starter warm around 75°F/24°C for optimal microbial activity.
- Adjust hydration by slightly altering water content to thicken or loosen your starter, influencing fermentation speed and bubble formation.
- Use clean containers and utensils to prevent contamination.
Nurture patience - every starter behaves uniquely, reflecting local wild yeast strains and flour variations. Watch it bubble, swell, and double in volume as proof of its vitality.
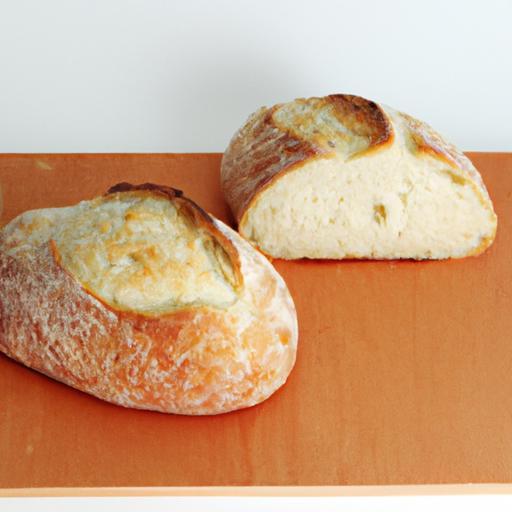
Baking Tips to Achieve the Ideal Crust and Crumb Texture
Executing sourdough baking to perfection melds technique with timing. After shaping your dough, allow a long, cold overnight fermentation in the refrigerator to develop complex flavors and improve crust crispness. This slows enzymatic activity, yielding a beautiful chewy yet tender crumb.
Preheat your oven thoroughly with a baking stone or steel to provide intense bottom heat that promotes oven spring-the dramatic rise during the first minutes of baking.
Introduce steam by placing a tray of boiling water or a damp towel in the oven at the start; this keeps the crust soft while the loaf expands, before forming a golden, crackling exterior.
When the crust attains its rich amber color and the loaf sounds hollowwhen tapped underneath, remove it promptly to avoid overbaking and dryness.
Prep and cook Time
- Starter refreshment: 8-12 hours (active fermentation)
- Dough preparation and bulk fermentation: 4-6 hours (room temperature) or overnight cold retard
- Baking: 40-50 minutes
- Total: Approximately 12-18 hours (including passive fermentation time)
Yield
One medium-sized loaf yields 1 artisan-style bread (about 800 g).
Difficulty Level
Medium – Requires patience and attention to fermentation cues.
Ingredients
- 150g active sourdough starter (fed and bubbly)
- 375g unbleached all-purpose flour
- 125g whole wheat flour
- 350ml filtered water, room temperature
- 10g fine sea salt
Instructions
- Mix flours and water in a large bowl until no dry spots remain. Cover and let rest (autolyse) for 1 hour to develop gluten.
- Add the active starter and salt. Incorporate thoroughly by folding and squeezing the dough until the starter and salt are fully distributed.
- Bulk ferment the dough at room temperature (around 75°F/24°C) for 4 hours, performing a set of stretch-and-folds every 30 minutes during the first 2 hours to build strength.
- Shape the dough gently into a tight round or oval loaf. Place it seam side up in a floured banneton (or bowl lined with a tea towel).
- Retard in the refrigerator overnight (8-12 hours) to slow fermentation and enhance flavor.
- Preheat oven with baking stone to 475°F (245°C) at least 45 minutes before baking.
- Transfer the dough carefully onto parchment paper, slash the surface with a sharp blade to allow expansion.
- Bake with steam by placing a tray of hot water in the bottom oven or spraying water inside. Bake for 20 minutes covered (if using a Dutch oven) or with the water tray in place.
- Remove the steam source or lid and bake another 20-25 minutes until deep golden brown and crusty.
- Cool entirely on a wire rack before slicing to set the crumb structure.
Chef’s Notes
- For a more sour flavor, extend the cold fermentation to 24 hours.
- Substitute rye flour for up to 50g for an earthier note and improved fermentation activity.
- If your starter is sluggish, increase feeding frequency or slightly raise the ambient temperature.
- Use a kitchen scale for precise measurements-sourdough thrives on accuracy.
- Store leftover bread wrapped in linen or a breathable bag to maintain crust crispness.
Serving Suggestions
This loaf shines simply smeared with creamy butter and a sprinkle of flaky sea salt. Pair it with fresh ricotta and a drizzle of honey for breakfast, or alongside hearty soups and stews, where its robust crust can hold dips beautifully. Garnish with fresh rosemary or thyme sprigs for an irresistible rustic touch.

| Nutrition | Per Serving (100g) |
|---|---|
| Calories | 250 kcal |
| Protein | 8g |
| Carbohydrates | 50g |
| Fat | 1g |
For deeper knowledge on flour types, check our Complete Flour Guide for Bread Baking.For scientific insights on fermentation, visit ScienceDaily’s article on sourdough microbiology.
Q&A
Q&A: Mastering Sourdough – Your Ultimate Homemade Bread Guide
Q1: What exactly is sourdough, and how does it differ from regular bread?
A1: Sourdough is a type of bread made using a natural fermentation process. Rather than commercial yeast, it relies on wild yeast and lactic acid bacteria that live in a “starter” – a bubbly, tangy culture of flour and water. This fermentation not only gives sourdough its signature tang and chewy texture but also makes it more digestible and longer-lasting than typical baker’s yeast bread.
Q2: How do I create my own sourdough starter from scratch?
A2: Think of your starter as a living baking companion! To create it,mix equal parts of flour and water and leave it at room temperature. Over days, wild yeast and bacteria from the environment will colonize it. Feed it daily with fresh flour and water, watching it bubble and grow until it’s active and ready to leaven your dough. The magic typically happens in about 5-7 days.
Q3: What’s the secret to getting that perfect sourdough crust?
A3: The crust is all about moisture and heat. Baking your bread in a Dutch oven or covered vessel traps steam,which helps develop a crisp, glossy crust. Also, scoring your dough before baking allows it to expand nicely and creates those signature rustic lines. High oven temperatures (450°F/230°C) contribute to caramelization, creating that golden, crunchy shell.
Q4: How do I maintain my sourdough starter in the long run?
A4: Treat your starter like a pet. If you bake regularly, keep it at room temperature and feed it daily. If you want a break, refrigerate it and feed it weekly. Always discard some starter before feeding to keep the microbial balance happy. With proper care, your starter can last for years, developing complex flavor notes.
Q5: Can sourdough be made gluten-free?
A5: Absolutely, but it’s a bit trickier! Gluten-free sourdough starters can be made using gluten-free flours like buckwheat or brown rice. The wild yeast will still ferment, but gluten-free doughs lack the elasticity gluten provides, so expect different textures. Patience and experimentation are key here!
Q6: Why does sourdough taste sour, and how can I adjust that flavor?
A6: The sourness comes from lactic and acetic acids produced during fermentation. Longer, slower fermentation tends to increase the tanginess. Want less sour? Try shorter fermentation times or keep your dough warmer to favor lactic acid bacteria, which produce a milder flavor. For a stronger kick, ferment longer or keep the dough cooler to promote more acetic acid.
Q7: What common mistakes should I avoid as a sourdough beginner?
A7: Don’t rush the fermentation process or skip feedings-the yeast needs time and nourishment to thrive. Avoid adding commercial yeast or ingredients like fats and sugars too early in the process, which can interfere with fermentation. Also, be cautious not to over-proof your dough, or it will deflate and lose oven spring.
Q8: How can sourdough baking benefit my health?
A8: Thanks to natural fermentation, sourdough may help break down gluten and phytic acid, making nutrients more accessible and easier to digest. The presence of beneficial bacteria can also support gut health. Plus, without commercial yeast and additives, it’s a purer, more wholesome bread option.
With these answers in your culinary arsenal, you’re well on your way to mastering sourdough-creating bread that’s not just food but an artful expression of time, patience, and nature’s own chemistry! Happy baking!
In Retrospect
As you close the chapter on your sourdough journey, remember that mastering this ancient art is as much about patience and curiosity as it is about flour and water. Each loaf is a story-marked by the rhythms of fermentation, the warmth of your kitchen, and the hands that shaped it. With this guide in your arsenal, you’re not just baking bread; you’re cultivating a living tradition, one crumb at a time. So, keep experimenting, savor the little victories, and let your homemade sourdough become an appetizing testament to your dedication and creativity. Happy baking!