There’s a sweeter side to summer-and it’s waiting to be unlocked in the creamy, dreamy world of honey-infused ice cream.Enter the Ninja Creami, the game-changing kitchen gadget that transforms simple ingredients into luscious frozen delights with just a few spins. In this article, we’ll guide you through the art and science of crafting your very own honey ice cream, blending the natural floral sweetness of honey with the silky texture that only the Ninja Creami can achieve. Whether you’re a dessert devotee or a curious kitchen adventurer, prepare to discover how easy it is to capture sweet bliss in a scoop.
Unlock Sweet Bliss: Making Ninja Creami Honey Ice Cream
Unlock sweet bliss with this luscious honey ice cream base, designed specifically for your Ninja Creami. Infused with natural honey’s delicate floral notes, this recipe balances smooth creaminess with a subtle sweetness that dances on your taste buds. Whether you crave a refreshing treat or a sophisticated dessert centerpiece, mastering this honey-infused base is your ticket to an unforgettable ice cream experience.
Prep and Cook time
- Preparation: 10 minutes
- Chilling: 6 hours (or overnight)
- Processing with Ninja Creami: 10 minutes
- Total Time: Approximately 6 hours 20 minutes
Yield
- About 1 pint (4 servings)
Difficulty Level
- Easy – Perfect for beginners and seasoned Ninja Creami users alike
Ingredients
- 2 cups whole milk (preferably full-fat for creaminess)
- 1 cup heavy cream (cold)
- 3/4 cup honey (raw or mild blossom honey recommended for best flavor)
- 3 large egg yolks (for richness and silky texture)
- 1/4 teaspoon kosher salt (to balance sweetness)
- 1 teaspoon pure vanilla extract (to deepen complexity)
instructions
- Warm the milk and honey: In a medium saucepan over medium heat, combine the whole milk and honey.Stir gently until the honey fully dissolves and the mixture is warm but not boiling (about 5 minutes).
- Whisk the egg yolks: while the milk is warming, whisk the egg yolks in a heatproof bowl until smooth and slightly pale.
- Temper the yolks: Slowly ladle about ½ cup of the warm milk mixture into the yolks, whisking constantly to avoid curdling.
- Cook the custard base: Pour the tempered yolks back into the saucepan with the remaining milk mixture. Cook over low heat, stirring constantly with a wooden spoon or silicone spatula, until the custard thickens enough to coat the back of the spoon (~170°F or 77°C). do not let it boil.
- Strain and cool: Remove from heat and strain the custard through a fine mesh sieve into a clean bowl to ensure silky smoothness. Stir in the heavy cream, salt, and vanilla extract.
- Chill thoroughly: Cover the mixture with plastic wrap, pressing it directly against the surface to prevent a skin from forming. Refrigerate for at least 6 hours or overnight.Deep chilling is essential for the Ninja Creami to achieve that creamy, dreamy texture.
- Prepare for Ninja creami: Pour the chilled custard into your Ninja Creami pint container, seal tightly, and freeze for 24 hours before processing according to Ninja Creami’s guidelines.
Chef’s Notes: Tips for Success
- Honey selection: Choose mild floral honeys like clover, acacia, or orange blossom for a balanced sweetness that won’t overpower the custard. Raw honey provides depth but may affect texture slightly.
- Egg-free option: Substitute ¼ cup of cornstarch for the egg yolks, mixing it with the milk and honey before heating to achieve a custard-like consistency.
- Prevent graininess: Always strain your custard and chill entirely. This step is critical to avoid ice crystals in the final ice cream.
- Make ahead: You can prepare the ice cream base up to two days in advance; just keep it tightly covered in the fridge.
- Honey swirl idea: After the first Ninja Creami spin, add a tablespoon of honey and swirl lightly for an extra punch of sweetness and texture contrast.
Unlock Sweet Bliss with Serving Suggestions
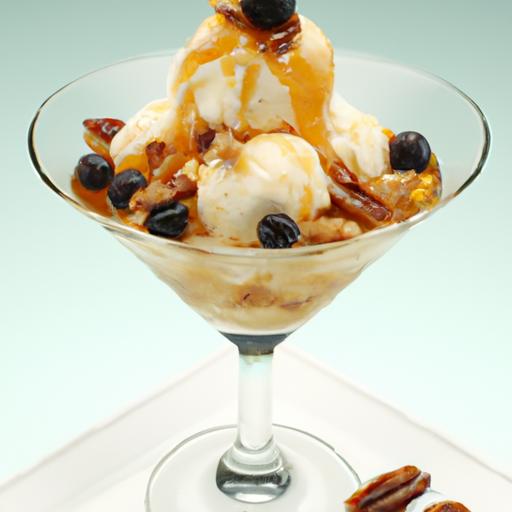
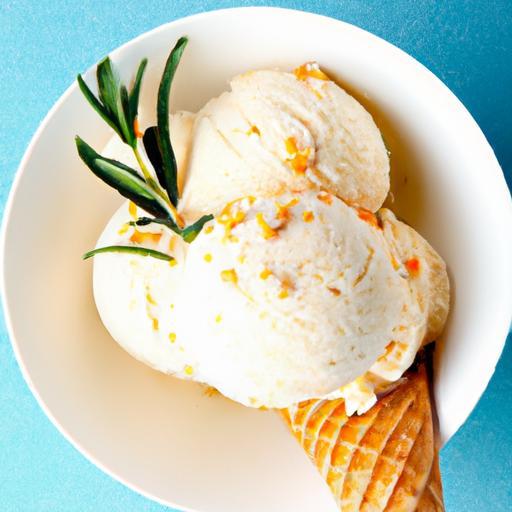
Delight your guests by presenting this honey ice cream with subtle complements that highlight its natural sweetness. Consider garnishing with toasted almonds or crushed pistachios for a crunchy contrast that pairs beautifully with the creamy base. Fresh berries-like blueberries or raspberries-add a bright and tart counterpoint. For an elegant touch,drizzle lightly warmed honey or a squeeze of citrus zest over each scoop. Serve in chilled bowls or delicate glass cups to keep the ice cream’s texture perfect for longer. The gentle sip of a late-harvest Riesling or a light herbal tea creates an unforgettable dessert experience.

| Nutrient | Per Serving (1/4 pint) |
|---|---|
| Calories | 230 kcal |
| Protein | 4 g |
| carbohydrates | 27 g |
| Fat | 12 g |
For more creative Ninja Creami recipes, explore our complete collection of luscious creams and sorbets. To learn more about the science behind ice cream custards, visit Serious Eats’ in-depth guide.
Q&A
Q&A: Unlock Sweet Bliss with Ninja creami Honey Ice Cream
Q1: What makes Ninja Creami the perfect choice for making honey ice cream?
A1: The Ninja Creami is like your personal ice cream artist, transforming simple ingredients into creamy wonders. Its unique spinning technology churns frozen mixtures into velvety textures faster than traditional methods-perfect for highlighting honey’s natural sweetness without any graininess.Q2: How does honey enhance the flavor of ice cream?
A2: Honey adds more than just sweetness; it brings floral notes, depth, and a smooth richness that elevates the classic ice cream base. Unlike sugar, honey has trace minerals and flavors that create a complex, luscious taste experience, making every spoonful a delightful surprise.
Q3: Can I customize my Ninja Creami honey ice cream?
A3: Absolutely! the beauty of the Ninja Creami is its versatility. Mix in nuts, swirl in cinnamon or lavender, or add a pinch of sea salt to contrast honey’s sweetness. Experimenting lets you craft your own signature scoop that’s perfectly tailored to your taste buds.
Q4: What are the key steps to making honey ice cream with the Ninja Creami?
A4: Start by blending your cream, milk, honey, and a dash of vanilla extract. Freeze the mixture solid in the Ninja Creami pint container, then let the machine work its magic. Within minutes, you’ll have smooth, dreamy honey ice cream ready to enjoy or customize!
Q5: Is Ninja Creami honey ice cream healthier than store-bought options?
A5: Generally yes, because you control the ingredients and avoid additives or excessive sugars. Using natural honey and high-quality dairy means you get a creamy treat with wholesome goodness-plus, homemade ice cream always tastes better!
Q6: Any expert tips for achieving the creamiest texture?
A6: keep your ingredients well chilled before mixing, use full-fat dairy for richness, and don’t skip the post-spin “ream” cycle if your Ninja Creami offers it.This extra step smooths out any lumps,making your honey ice cream luxuriously creamy every time.
Q7: How should I store my honey ice cream for maximum freshness?
A7: Store it in an airtight container in the freezer. For best texture, let the ice cream soften a couple of minutes at room temperature before scooping. This unlocks the full flavor and creamy consistency of your honey-infused masterpiece.
ready to unlock your sweet bliss? With the Ninja Creami and a touch of honey, homemade ice cream has never been so enchanting-or delicious!
In Summary
As you savor that first luscious spoonful of your homemade Ninja Creami honey ice cream, you’re not just enjoying a dessert-you’re experiencing a little scoop of handcrafted joy. With the perfect blend of creamy texture and natural sweetness, this recipe invites you to unlock a world where simple ingredients transform into sweet bliss. Whether it’s a quiet night in or a celebration with friends, your honey ice cream will always be ready to turn moments into memories. So go ahead,embrace the magic of the Ninja Creami,and let every bite be a reminder that homemade happiness is just a spin away.